
Materials:
Pencils in a variety of hardnesses
Kneadable eraser
Pencil sharpener
Drawing paper
A solid surface to draw on
Not a lot of materials for this one. That last one is actually one of the most important materials! The surface you draw on will affect the way the marks show on your paper. I draw on a vintage drafting table (thanks Dad!!) with a somewhat soft, smooth surface. I recommend a drawing board (easily acquired in various sizes) or the cardboard backing of a sketchbook. You want a smooth, even surface.

Here's my traced drawing on my drafting table and a variety of pencils. I used a Strathmore drawing paper. It's a thin paper designed for pencil drawings.

This faint image is the lines left after erasing. My initial lines were a little too heavy so I erased them somewhat.

Next, take a B pencil and start shading. I used a 6B. I wanted something soft that I could blend with a tortillion/blending stump. Try to avoid blending with your fingers. The oils can leave traces as the paper ages.

Using the tortillion, I blended the 6B markings. I tried to create some roundness to the figure by blending in an arc motion. I also tried to follow the lines of the body & the places where there would be creases in the outfits. There are close-ups later on that show this better.

Next, I used a 2B pencil to outline the figure and outfits, as well as adding some hatching. Hatching and cross hatching are a great way to add texture and variety to a drawing. Hatching is just lines drawn in one or more directions, potentially overlapping. I did that here on all of the clothing and shoes. I left the body as-is with the soft shading from the previous steps.
Continue to use hatching & cross hatching to build up the tone of your image. I switched to an HB pencil. I switch between soft & hard pencils a lot. It's nice to add the dark tone with a B, then go over it with an H. It's almost like the H pencil sets the B pencil.


These are close-ups of the work in progress. The shorts are starting to develop a nice jean texture. The face image is a little blurry, but there are some nice tones happening in the hair, and I love the softness of the shading on the skin.

After adding hatching with the HB pencil, I wanted to darken the shadows again. It's really just a lot of back & forth. Add shadow with a B, blend in with an H, darken the shadows with a B, repeat, etc.

More of the same. I again used cross hatching with an H pencil then darkened the shadows with a B. In this case, I used a 2H and a 6B. High numbers are greater degrees - 6B is the darkest/softest pencil I used on this drawing.

At this point, I've finished with the hatching and shading. I darkened some of the lines and added a stippled/dotted texture to the sandals so they would look like cork soles.

This close-up shows the shoes as well as the skin tone. I think of different grades of pencil almost as individual colors. It helps to create a variety of tones. I could have kept pushing this further & further, but sometimes it's just overworking!

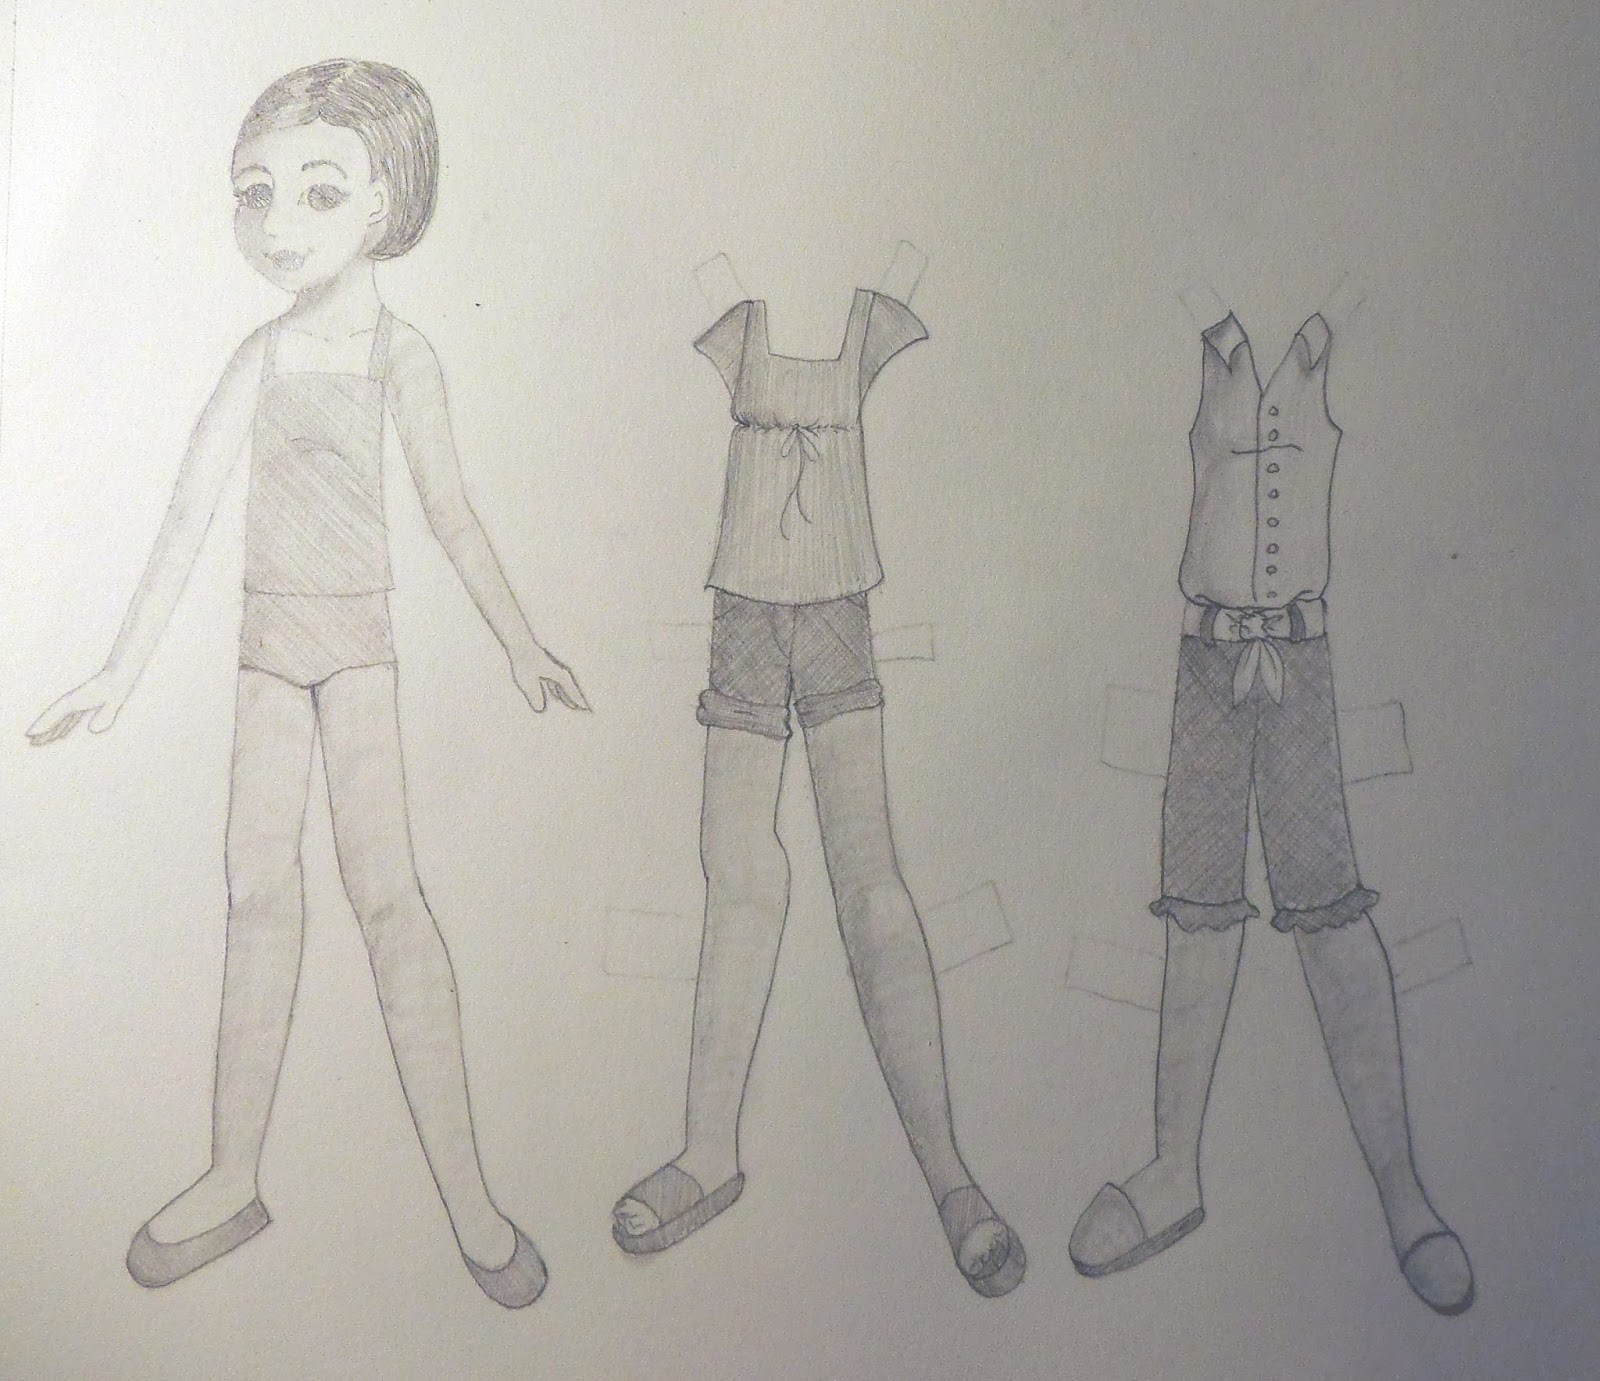
Here's the final image. I used a soft eraser to pull out some subtle highlights, particularly on the shorts to give them a jean look.
This lesson ended up longer than I expected! Next week we'll look at how to color this in Photoshop to get that illustrated look I mentioned in the last post.
Happy drawing!!
No comments:
Post a Comment
Comments post after approval