Monday, January 5, 2015
Quickie Tutorial: Creating Stripes and Plaid in Photoshop
There are a few reasons why I chose the project I did this year. First, I have several random paper dolls started. Some are just a doll base and some are partial or complete doll & outfit outlines. This paper doll was just a doll base and I thought it was time to flesh it out. Secondly, I wanted to get to know my Surface computer a little bit better and the best way to learn is to work. And finally, I needed to brush up on Photoshop.
And here's my first tutorial of the year! There's a fun trick I learned in Photoshop several years ago while working on my design certificate. One of my teachers showed us a great technique for making a quick stripe or plaid.
That's what I'll be sharing today.
You'll need Photoshop and an image. Doesn't really matter what the image is as long as you like the colors.
I found this landscape online using an image search. The colors are great! Open your image in Photoshop.
Go to the selection tool (second tool down on the toolbar on the left) and select the Single Row Marquee Selection tool. Use it to select a single row of pixels in your image.
Create a second layer or new Photoshop file. I like to use a new file and make it square. Squares just seem to make better patterns...
Using the singles row selection tool, copy a single row of pixels and paste it into your new file.
This is what you'll see. Select the Move tool (it's the first tool -- the arrow one -- at the top of the toolbar on the left). Use the Move tool and stretch the single layer so that it covers your document.
See how easy?! This would make a great stripe pattern. Use the rectangular selection tool and select the entire image. Go to Edit>Define Pattern and you've created a new stripe pattern.
To make a plaid, duplicate the striped layer. Rotate the new layer 90 degrees. You'll have one layer that's vertical stripes and one layer that's horizontal stripes. Change the opacity of the top layer. I changed mine to about 80% opacity. Doesn't really matter what it is.
Here's the plaid. Once you're happy with your plaid, merge your layers and select the entire canvas. Go to Edit>Define Pattern and create your pattern.
That's it. It takes just a few minutes to create a striped or plaid pattern that looks crazy complicated. It all depends on your original image. You can also take shapes or paint blobs or whatever and do the same thing. Play around with it and you'll find some interesting patterns!
Friday, August 19, 2022
How to Make Plaids and Checks
I skipped writing last week. I'm trying to get back into a once-a-week posting schedule but it doesn't always happen. This week, I want to share some ways to make plaids and checks. If you're a subscriber, you'll know that the next them is plaids and checks. (If you aren't a subscriber, you can become one here.)
I'm going to create my plaids and checks in Photoshop but these techniques should work in other similar programs. I also have a tutorial from 2015 that's fun for "complex" plaids so check that out. Let's start with checks.
In Photoshop, create a new square canvas. Mine is 3inches square. Using the Shape tool (it's the little rectangle icon), create a square that's half the size of your canvas. To do this, click once on your canvas and a menu will pop up. Type in your dimensions. You'll have exactly the right sized square and it'll look something like this:
In order to make this a checkered pattern, I need two squares aligned to the top left and bottom right corners of my canvas. To get this perfectly aligned, I use the Alignment tool. Select your square. Click on the three dots (circled in the image) and select Canvas. This aligns your shape to the canvas, not to other objects or shapes. Select Left and then Top (1 and 2 in the image).
So now there's one half of the pattern. Do the same thing for the next square but instead of selecting Left and Top, select Right and Bottom. You'll have something that looks like this:
Now I want to make this a seamless pattern. To do that I first rasterize the squares. Right now they're a vector shape. Right-click on the layer and then click on the Rasterize Layer option. Merge these two squares into one layer for a transparent pattern, merge all the way with the white background for a solid black & white pattern. I want mine to be transparent so I'm going to turn the visibility of that layer off by clicking on the little eyeball.
Select the whole canvas and go to Edit>Define Pattern. A little menu will pop up where you can name your pattern. I called mine "transparent check". If you don't do this, it'll have a sequentially numbered name (mine was Pattern 758) and that's just useless.
Click OK and there's your pattern! You can use this with the Fill tool (bucket) or as a Layer Style (fx) or as a Pattern Fill layer in the Adjustment Layers panel. I'll use it as a pattern fill layer on a new canvas to test it out.
In your Layers menu, click on the half black/half white circle icon to open the Adjustment Layers panel and select pattern (circled). You'll get a menu of patterns. Since this is my newest pattern, it's the last one WAY at the bottom. Click on it and tinker with it. I changed the scale of mine.
And that's it! You can use the pattern with a clipping mask. You can add it to an existed layer and change the opacity or layer styles like multiply or screen.
Creating a plaid is only slightly trickier.
To start, I'm going to make a rectangle that is the same height as my canvas. It can be any widths. Right now, mine is 1in by 3in. I'm going to align it to the right and center using the method from above. Now I'm going to make a few rectangles of various widths but all of them will be 3 inches tall.
Here are my rectangles. Each one is the same height as the canvas and they're all aligned along the center. At this point, I rasterize each layer. Then, selecting all four layers in the layers panel, I duplicate the layers. While they are still selected, rotate them 90 degrees.
It's starting to look like a plaid! I have one set of vertical stripes and one set of horizontal stripes. I'm going to change the opacity of the horizontal stripe and test my pattern. Select all of the layers that you want in the pattern and go through the steps from above.
It's not the most exciting plaid ever but it works.
Now here's where the fun starts! Go back to the original file and change the colors of the rectangles. You can make it as colorful as you like!
Once I added my colors, I decided to change the opacity of the vertical strips to 75%. It makes for a more realistic pattern. I tested it with a Pattern Fill Adjustment Layer. And I changed the angle to 45 degrees.
And that's it! There are so many ways you can arrange rectangles to make plaids. Here's one more plaid and the tile I made to create it.
These are simple plaids. You can get far more complicated if you'd like! Look for inspiration, too, and just break down plaids into square patterns. And have fun with it!
AND...you can save these patterns as JPGs to use in other programs, like Procreate. I do that all that time!
Happy plaid making!!
Tuesday, December 8, 2015
December Paper Doll -- Santa Claus, Outfit 4
Today we have the first of what I call hunter plaid, but recently found out is actually called "buffalo check" or "buffalo plaid". I'm not sure of its origins -- that's another project for another day. The reason I always thought of it as hunter plaid is because that's what all of the hunters in my home state of Vermont wore during hunting season. My father wears the red & black while one of my grandfather's wears green & black. If you're ever in New England, go to Johnson Woolen Mills. I have my own Johnson Woolen hunting jacket (it was too small for my dad) and I love it. Warmest jacket I own and might end up being multi-generational. It's built that well! Anyway, Johnson Woolen is an institution and was the inspiration for this set of outfits.
Tomorrow, Mrs Claus is sporting her plaid outfit. I need to add sewing to my list of things to learn. I'd LOVE to make myself a quilt from Johnson Woolen flannel fabrics. There's always time to learn!
Feel free to right-click to download this and I'll have the pdf at the end of the month!
If you're looking for the dolls, you can grab them here.
Wednesday, December 9, 2015
December Paper Doll -- Mrs Claus, Outfit 4
This cape is loosely based on capes from Johnson Woolen Mills in Vermont. Really, just go visit. The building is old and creaky and amazing. I haven't been in years, but Dad and I keep talking about taking my boys to get their first Johnson Woolen jackets. We'll make a family trip of it one of these days.
The other influence for is Armstreet. They have the most amazing fantasy, Ren-Faire, historical revival clothing. I could just make an Armstreet inspired paper doll and be blissfully happy.
So there it is, Mrs Claus in plaid. Right-click to grab it now or wait for the pdf at the end of the month.
If you're looking for the dolls, you can grab them here.
Friday, April 22, 2016
Toddler Fashion Friday - Riley
Since it's vacation, I haven't had much time to do paper doll related stuff. This doll is a bit of a quickie. And more plaid!
Friday, April 15, 2016
Toddler Fashion Friday - Cecily
Today's toddler is based on Cecilia. The plaid jacket is supposed to be a raincoat. I probably should have added a sheen or something to it. I love that plaid so much that I can't hide it under a shiny gradient! Aside from that, there isn't a whole lot to say about this one.
I'm still slowly picking away at the beach set. It's been a bit hectic around here lately! For those of you having spring vacation next week (like our school is), have fun!
Monday, March 3, 2014
Paper Doll Commission
At the beginning of the year, I wrote a post about all of the things I want to accomplish this year & some of the things I'll need to set aside temporarily. One of the things I decided to set aside were the PaperJane dolls. They weren't as popular as I had hoped, and were a bit of a pain to make. I love those dolls and want to go back to them, but I have bigger priorities this year.
And then I got the most random email ever!
I was contacted in January by the Fort Worth Country Day School in Fort Worth, Texas. They are celebrating their 50th anniversary and wanted a unique invitation for their party: a paper doll that showed the different eras of the school's history. I loved the idea!
They wanted a boy & a girl to represent the school and wanted it based on the PaperJanes. Because that's just the way fate works!! I developed a companion for Jane (I'm calling him Jack) and a wardrobe for them.
First, I sketched some concepts and we agreed on a pose for the girl. Above are some low-res sketches of the concepts. From there, I worked in Illustrator to develop the doll.
Here's the next-to-last (low resolution) version. We made a couple of minor changes, but this is essentially the doll. For each of the dolls, there's (in order): a 1960's letter jacket & cheerleader, a 1970's guy & girl, a 1980's preppy guy and workout girl, a 1990s prom couple, graduation, homecoming king & queen, and the school uniforms. I even replicated their plaid in Illustrator!
And this is the final invitation. It's a poster that opens up with various phases as you open it, and then, when fully opened, there's the doll! There were a few minor changes made that I think are great, like adding a logo the to boy's undershirt. We went with a one-piece plaid suit for the girl, and, again I think it was the right choice.
This was a wonderful commission and I'm so glad it came my way. I plan on framing this & hanging it in my studio -- that's how much I love it!
When I feel up to working with the PaperJanes again, I'll be adding Jack to compliment Jane and some of these outfits may show up in some variation.
So thanks again to the Fort Worth Country School for such a unique opportunity & I hope all of you out in paperdoll fandom like this too!
Monday, December 15, 2014
December Paper Doll - Outfit 7 in Red
And on a totally unrelated note, today is a very special day in our house. Today is my son Noah's 5th birthday. I can't believe this amazing little man is already 5. Mothers more experienced than me say that the days are long but the years are short. It's very true. I wouldn't trade any of it for anything! So happy birthday my dear boy. It's going to be a fun day!
We're about halfway through the December dolls. PDF at the end of the month!
Friday, September 7, 2018
August Paper Doll - Set 5
First up is "magazine". I wasn't sure what to do for magazine and then it came to me - she's a photographer for a well known nature magazine! For "tile" I used a vector tile pattern as a fabric pattern. "Countryside" is a set of cowboy boots and leggings. "School" is a bright plaid skirt and sweater vest. "Greeting" is a graphic tee - and, honestly, if I'm out of ideas, I go to a graphic tee. That's just the way it is! "Dairy" is a dairy farmer in overalls. And, finally, "prize" is a medal winning tennis pro.
I'll get started on the September set. The doll will be the January doll & September will be the last round for that set. I recently cut out the January and May sets and it was MASSIVE!
I haven't counted the pieces yet but it's a lot! I have a Silhouette Cameo cutter and that did all of the cutting for me. I'd like to create something out of this whole year's project - a book, a calendar, both??? I dunno yet! But I'll keep working on it - look for more next week!
Friday, January 25, 2013
Fashion Friday - Celia
Friday, September 27, 2019
Paper Doll Collaboration 2019 - Patterns
This month the theme is patterns. If you've spent any time on this little ol' blog at all, you'll see just how much I LOVE patterns! So this was a blast to put together! The challenge was black & white. Most of the patterns I use are color but I had some cool monochrome ones and that's what I used here.
I went with a fall feel to this set even though fall hasn't completely set in here in New England. There's a chunky sweater, patterned skirt, jean leggings, plaid jacket, blouse, and patterned pants to mix and match.
Check out Paper Thin Personas and Miss Missy for more of this project!
Friday, April 3, 2015
A Family at Easter Paper Doll Set
Now that I got that out of the way, I have an Easter family paper doll set this week!
And finally, little miss Ivy. I skipped the mix & match wardrobe this time and went with just dresses. Her hat is the same as Dahlia's. I don't draw a lot of hats so if these are a little off, then, well, I guess I need more practice!
Also, I've started venturing into stock art. I love creating vectors, so I thought I'd try selling them. Some of the elements in this set are from this experimenting. You can find them here and here.
And one more note. If you love the font on the paper doll cover as much as I do, you can get it here. I grabbed it for free during a promo, but all of the Ornaments of Grace sets are gorgeous. (And I don't know the artist or have any financial interest, etc. Just sharing something I love! Good karma & such.... )
So to all of you celebrating Easter, enjoy it! I'll be cooking for my in-laws and having a generally busy weekend!!
Friday, March 27, 2015
Toddler Fashion Friday - Lulu
Speaking of schedule.... here's this week's toddler paper doll! This one is based on Lily, a paper doll I actually double posted ages ago. Oops. These things happen! And it's another plaid because I've had a thing for plaids I guess.
Friday, February 20, 2015
Toddler Fashion Friday - Hailey
Today is another toddler paper doll. I'll be at these for a while -- I'm really loving these! This one is inspired by Hannah, with her sort of 80s inspired fashions.
Friday, February 13, 2015
Toddler Fashion Friday - Molly
Also, I want to say thanks. I don't say that nearly often enough. February has been a big month for me as far as paper doll book sales. I'm immensely proud of being a working artist (even if I'm not a pay-the-mortgage level working artist!!). Creating art is my vocation. I happen to create paper dolls right now because I love it and it's a non-messy art form that I can do around my kids. Every book sale, comment on the blog, social media share, etc, helps me keeps me doing the work I love. And I'm glad so many people outside of my little corner of the universe enjoy what I do, too.
Tuesday, September 11, 2018
September Paper Doll - Set 1
The September outfits fit the January doll (as do the May outfits). This will be the last month for the January doll! For September, I wanted seasonal colors but not deep autumn colors like red and orange. I wanted more sunflowers and sunshine than apples and foliage, if that makes sense. I'm not entirely happy with these colors - the brown and orange are too similar now that I see them together but I'm going to stick with it anyway.
Here are the September themes. If you'd like to follow along, I'm using the drawing suggestions from @ellolovey on Instagram and she's on Facebook, too.
The first theme this month is "balloon animal". I studied art history and I can't think about balloon animals without thinking about Jeff Koons. So I made a balloon animal skirt. Next is "latte art" in the form of a layered graphic tee and scarf. "Classroom" is another school uniform inspired set of a plaid shirt & sweater vest. "Whiskers" is a cat sweater and matching cat headband. "Pizza" is a repeat theme and I went with a pizza graphic and pattern. "Books" is a pair of leggings with a book pattern. There's also a few mix & match pieces, too, in the form of a tee, pants, a skirt, and a tunic. There may even be pieces that match from previous months!
Also, for anyone who hasn't heard yet, my first book with Paper Studio Press is available for pre-order! You can look at it here and I'll share more when I get mine!!
Friday, March 20, 2015
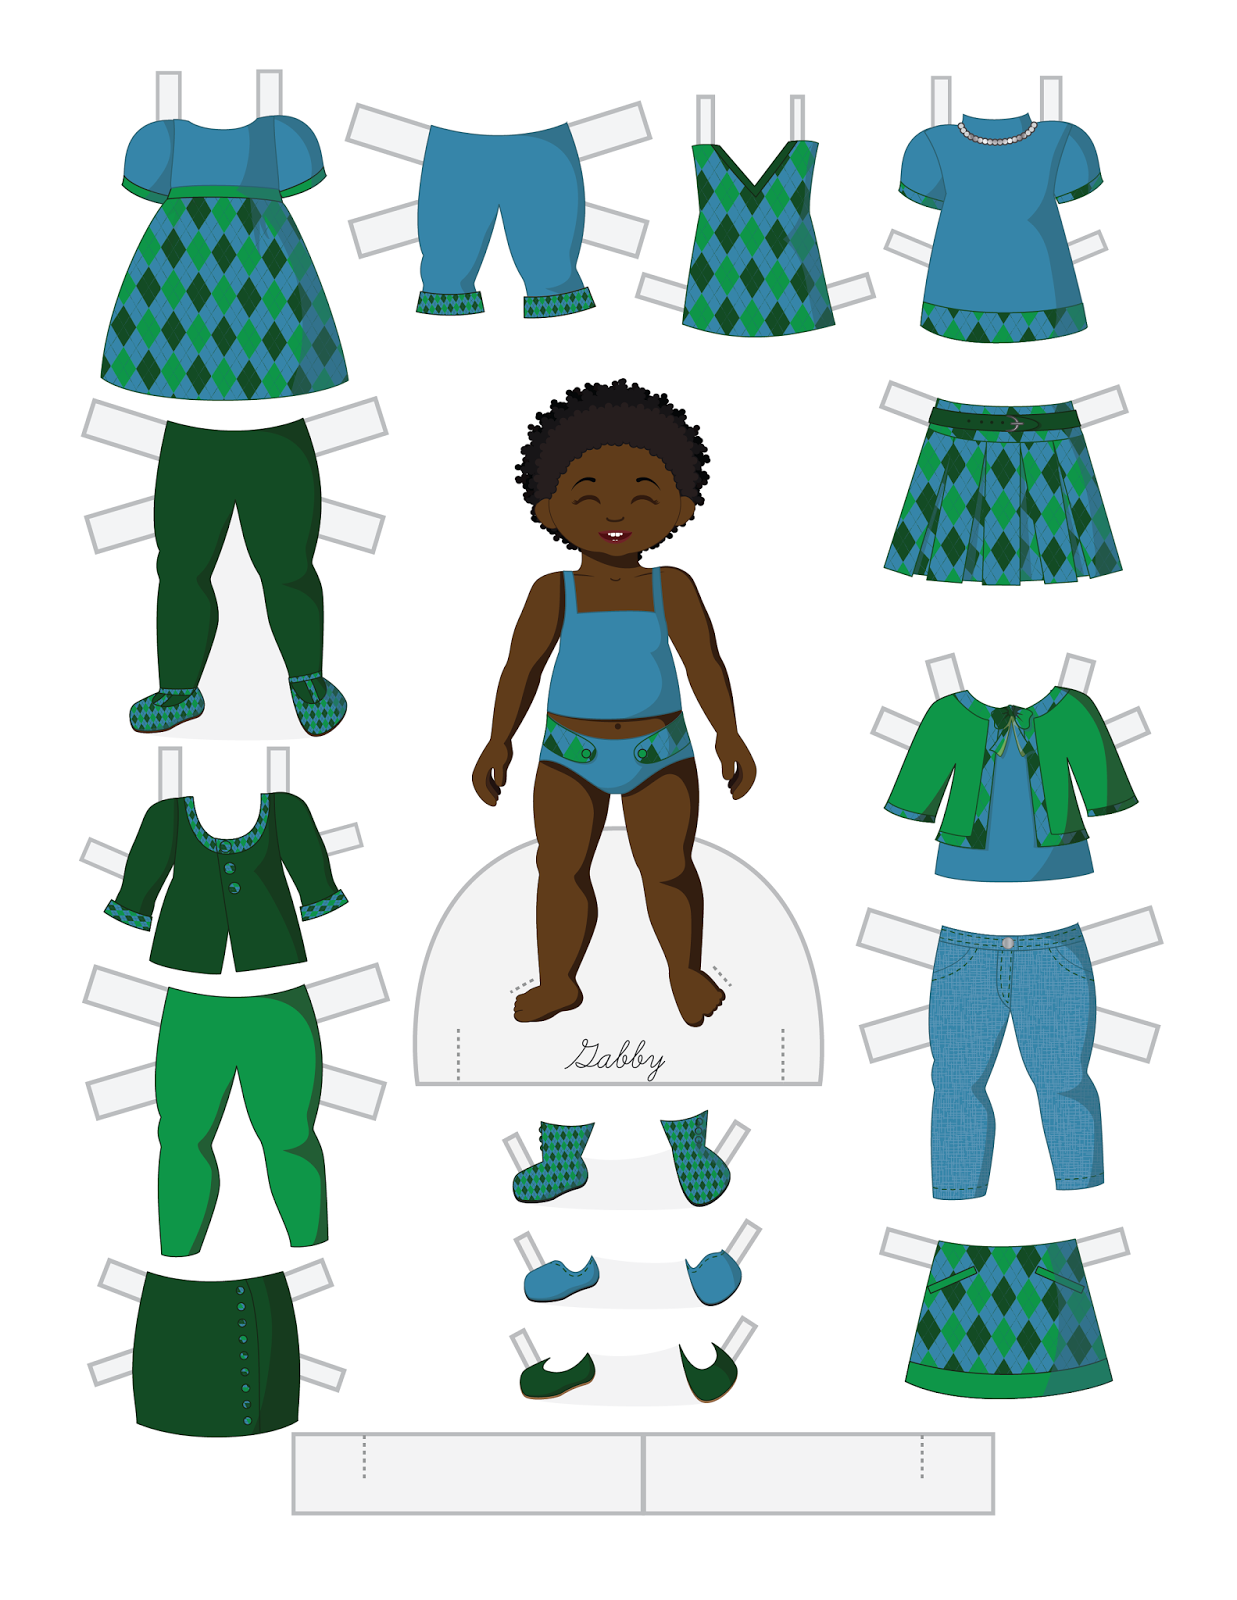
Toddler Fashion Friday - Gabby
Today I have Gabby, inspired by Grace. Gabby has a kid-sized afro and a plaid wardrobe. I think she's adorable! It isn't a perfect set, but I like it nonetheless. I hope you do too!
Friday, September 16, 2022
Queen Elizabeth II Paper Doll in Tartans
August came and went in a blur! Our Disney vacation was a ton of fun. The kids LOVED it! It was hot. It rained. We walked a zillion miles a day. I destroyed my phone and my husband lost his credit card. My parents lost a piece of luggage (it was found!). But it was all worth it and it was super fun. Here's a goofy selfie to prove it!
Anyway....
The next issue of Paperdoll Review is all about plaids and checks. I was going to make a retro mod doll with some fun plaid outfits but it just wasn't coming together.
And then the Queen died.
I'm a low-key royal watcher. Not like obsessive or anything. My mother is close in age to Princess Diana and watched the wedding in the 80s with great enthusiasm. I'm about the same age as Prince William. I find the history of it all fascinating. So once the Queen's death was announced, I felt compelled to draw her for the magazine.
Her last official photo showed her at Balmoral in a tartan skirt and sweater. I knew from my own Scottish ancestry that tartans have their own histories and restrictions, much like coats of arms. There's a Scottish Register of Tartans that is just terrific! It has lovely samples and information about each tartan, which was a key part of creating this doll. Here I discovered that the Queen's tartan is the Balmoral tartan, exclusive to the royal family. I used that on my base doll.
Next, I wanted another tartan from the Queen's time at Balmoral. She seemed to favor tartans while in Scotland so there were loads to choose from. I wanted something from her later years so that it would be consistent with the doll. The green tartan in this image is another royal exclusive and that's why I went with it for my outfit.The other key part of my paper doll is Balmoral Castle. It was a favorite residence of the Queen and where she spent her final days. I found a lovely image on Wikipedia which was especially great because it's a Creative Commons image that I can freely remix! I tried working with it in Photoshop but to get the effect I wanted, I ran it through a watercolor painting simulation process in Photoshop.
So essentially I took all of these elements, about 5 hours in Procreate with another hour or so in Photoshop, and created my Queen Elizabeth memorial paper doll. Here's a 30 second time lapse video so you can get a sense of it.
There's also a wonderful write-up about the Queen on Jenny's paper doll blog with a link to a full resolution PDF of my paper doll. Go check that out, too.
Friday, April 6, 2018
April Paper Doll - Set 1
For April I knew I wanted two things: a dark-skinned paper doll and a bright, pastel color palette. The first theme for this set was Easter, so I went with a floral dress and hat. Next was rabbit - a bunny applique sweater. Garden is carrot patterned leggings. Rain is a bright yellow raincoat. Picnic is a plaid shirt with a basket and capri pants. And finally, logo is a farm logo in pastels.
Also, I just thought I'd share that I have a paper doll in the 2018 convention souvenir packet! You can find out more here or here. I am truly lucky to be part of such an amazing group of artists!
Monday, April 15, 2013
(More) Working with Watercolors and a Reveiw of Koi Watercolors
The paints I'm going to show you are Koi watercolor paints, manufactured by Sakura. That's the same company that makes Micron pens. I don't think I could live without Micron pens, so I thought it was time to try their watercolors. When it comes to art materials, I am a creature of habit. I've been using the same brands forever. I like what I like and I know how they work, so I rarely change what I use. These Koi paints are going to be a permanent part of my watercolor tools. I picked them up on Amazon for less than $20, and just the water pen is about $6 if you want to experiment with that.
These paints come in a variety of options. I chose the 24 color field sketching set. For more information about the set or other type of Koi paints, visit their website. Forgive the picture - my drafting table is in need of a serious cleaning!! What we're looking at here is the travel set. There is a large easel/mixing area in the top, a detachable palette on the right, two wetting sponges for travel painting, the 24 watercolor pans, and a water brush.
The first thing I noticed is the beautiful range of colors. I'm usually a minimalist when it comes to colors. Maybe I'll have a whole lesson on color mixing. It's actually very interesting. Secondly, the water brush is a neat idea.
There's a reservoir in the back of the brush and it's tipped with a very versatile synthetic brush. It's perfect for traveling. Even if you don't use the brush, it's an easy way to transport water. The sponges serve the same purpose. Not pictured is a ring that folds out from the bottom so that you can hold the paintbox in one hand and paint with the other.
Here's the water brush in action. I painted over a water-mixable crayon just to see what would happen. The water brush has a lot of potential for a variety of applications.
This image is a little light, and the painted paper doll will show this a little bit better, but this image is of paint laid down with the water brush compared to a traditional brush. The colors from the water brush tend to be more liquid and lighter. There isn't a constant stream of water coming out of it, but the tip does stay moist. This is great for wet-in-wet work, wetting dry media, and laying down washes.
So on to the doll.
Materials:
Koi Watercolor Paints
Water brush
Brushes
Illustration Board
Pencil, eraser
Water
For this doll I decided to test some illustration paper. It's 150lb paper and designed for multi-media purposes. This is the first time I've worked with it. It's very smooth and only buckles slightlyfrom the watercolors.
This is an image of my outlines. They are really, really faint. I find illustration board/paper erases very cleanly, and that's part of why the lines are so faint.
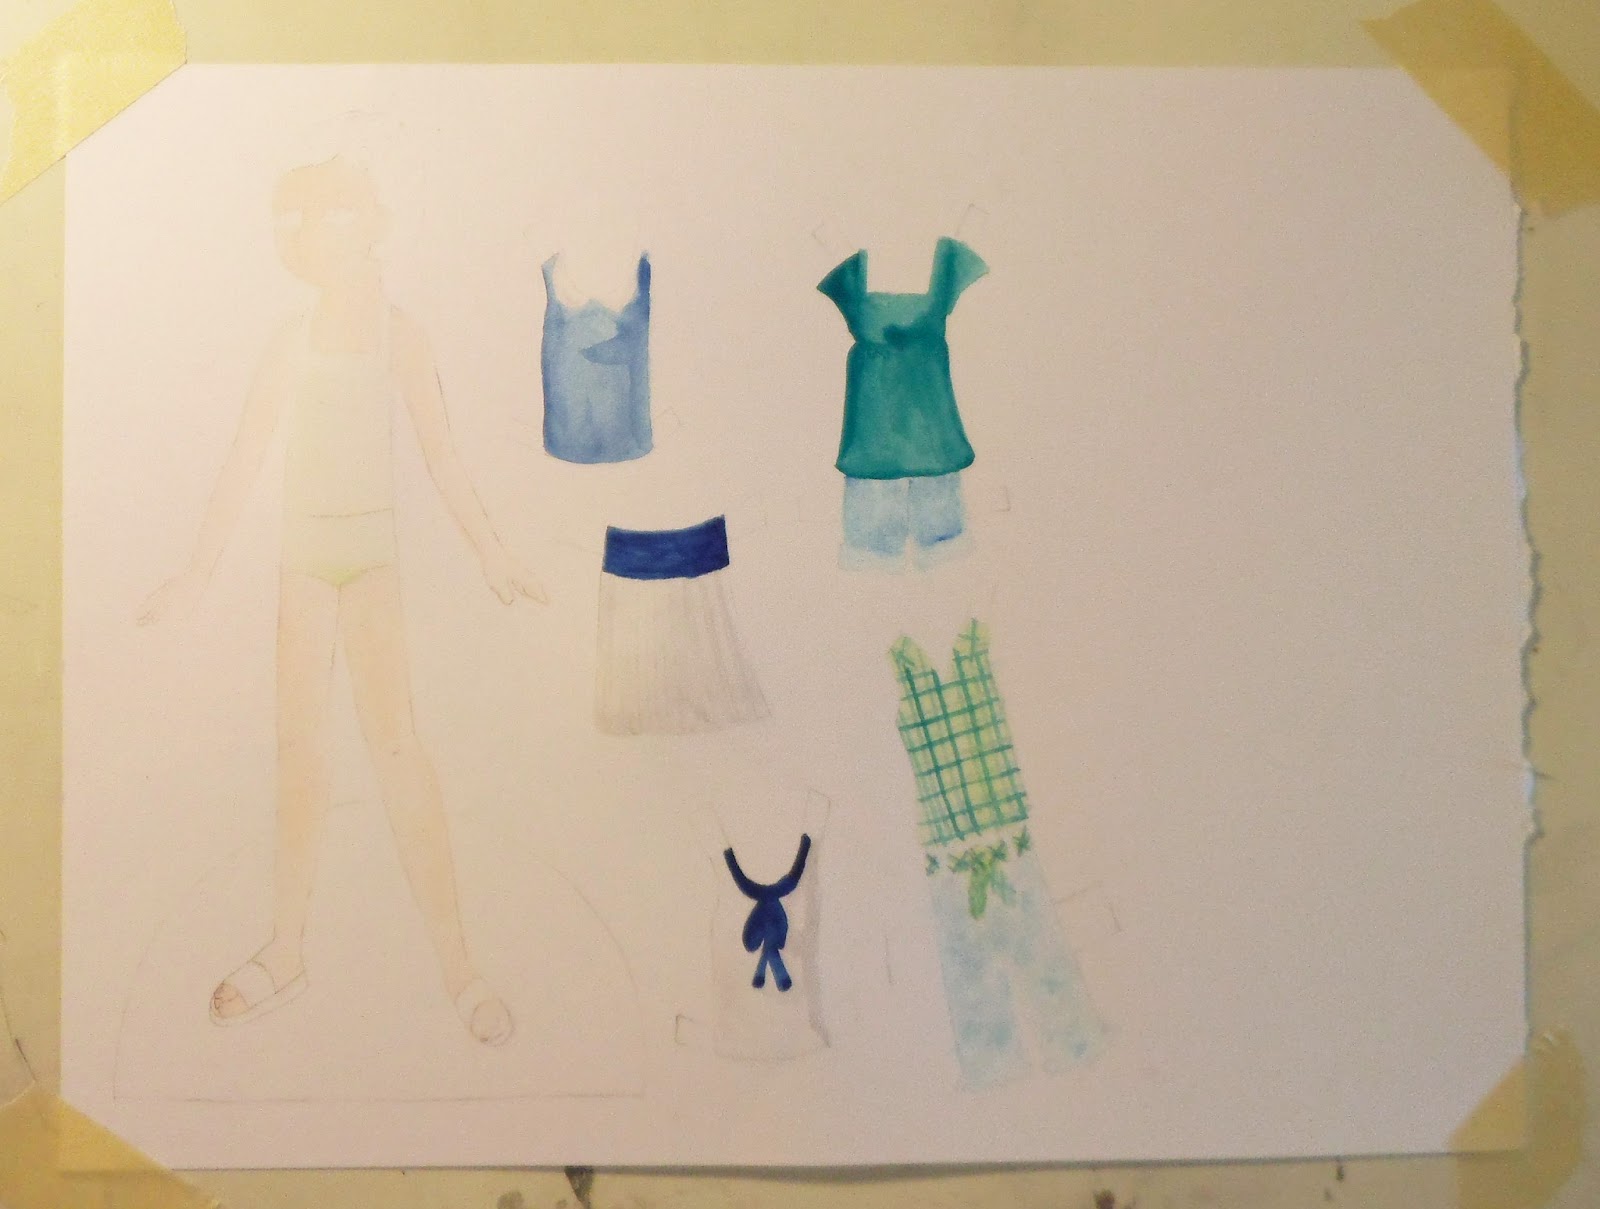
First, place a drop of water on each of your pans. I like to pre-wet my paints. It softens them up & makes them easier to work with. Here's the first layer of color. Take a look at the three navy blue outfits in the middle. The blouse at the top was painted using the water brush, while the belt & bow were painted with a regular brush. I tried to use colors straight out of the pan when possible to show the beautiful colors in this set. I used the water brush to apply the plaid pattern to the green top to demonstrate the flexibility of that brush. It can make reasonably fine lines, which is great.
Here's the second layer of color. I kept the shading in this to a minimum. I love the way the paint sits on this super smooth paper, but the one thing I can't seem to do is pull out paint. Sometimes it's nice to use a paper towel or tissue and pull out some of the wet paint. This wasn't really possible here. Not a huge issue, just a small disadvantage.
This is the final image. I will scan the doll later on & update the post so you can really see the doll.
Here's a close-up of the face. There's so much I love about this paints. They are smooth with no grit at all. The colors are rich and varied, and would be ideal for a variety of subjects. The water brush included in the kit has a lot of uses, from fairly wide washes to narrow lines. And this illustration board/paper is a nice alternative to rougher watercolor papers. I highly recommend these paints. They are about the same price as an intro set of Winsor-Newton Cotman pans (which is what I typically use). The Koi paints have twice as many colors, a water brush, and are easier to use in the field.
I'll admit this doll was a bit rushed. As I said, I'll scan it when I can and post that here as well. I just love these paints and wanted to share that. Any thoughts, questions, etc, just let me know. New doll on Friday!