First, let me just say that I have been sick & miserable and the kids have been sick & miserable. This is the first day we've all felt ok in a week or so. If my writing is a bit off, I blame the Dayquil.
Second, my husband bought me an international Ancestry.com membership for our anniversary this past weekend. I have always loved researching my family tree & history, but now it's virtually an obsession! According to the information I've found in the last couple of days, I may be related to King Arthur. What!? Exactly. I need to look into it a lot more, but how cool is that?!
Third, please be aware that I'm starting to insert affiliate links. I have control over what is advertised & I'm only posting relevant links to things I have used. Click them or don't; I just want to be transparent about it.
Anyway, enough about me. Let's talk Photoshop.
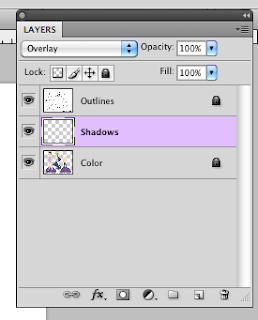
Open your file from last time. Preferably, you saved it as a .psd file. If you did, add a new layer under the outlines layer but above the colors layer, and name it Shadows. If you saved it as something flat (jpg, png, gif...), just add a new layer on top. We're going to work with layer blending modes again.
Lock your other two layers. We'll be working on the Shadows layer for now. Set your layer blanding mode to Overlay. I use overlay so that can paint all of the shadows in black. I don't have to find darker tones of all of my colors. Make sure your paintbrush is set to black & select a large, soft brush. We'll be creating soft shadows on the doll and clothes.
I selected a 200px soft brush set at 50% opacity. Use any size & opacity combination you like. And use the bracket button shortcuts to adjust your brush size on the fly. Another shortcut I love is Undo. Command (or Control)-Z to undo one step, Command-Option-Z (or Control-Alt-Z) to undo multiple steps.
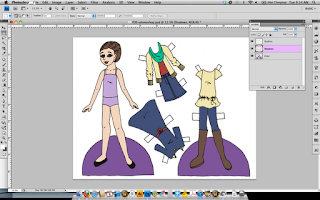
Here, I've roughed in the shadows in the doll. Don't worry about staying inside the lines. We'll get rid of any shadows we don't need later. Continue doing this on the doll and outfits until it looks good. Keep in mind light source direction - especially on the dress that's upside down!
Here are all of the shadows roughed in. At this point, go in and erase the shadows that fell outside the lines. Either erase them on the Shadows layer, or go to the Outlines layer, use the Magic Wand to select outside the lines, click back on the Shadows layer, and hit the delete button on your keyboard. That erases a lot of it, and then I can go back in and erase the rest.
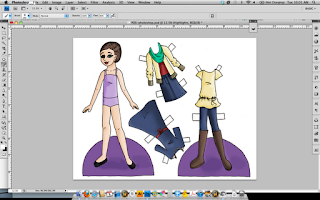
This is what the clean up looks like. I think this doll needs a Highlights layer, so we'll do that next. Create a new layer under Shadows and above Color. Change the blending mode to Soft Light. This will give the white a slightly transparent look without changing the opacity of the paint color. Lock the Shadows layer. Select your paintbrush at 100% opacity to start and paint in your highlights the same way you painted in the shadows.
In some areas, I changed the opacity of my paintbrush. Do this as needed. Add highlights where they look the best. Not everything needs a highlight. Clean up the highlight layer the way you cleaned up the shadow layer, as needed.
We'll stop there for today. Again, this would be a fine place to call the doll done & print it out and play with it, but I want to take this a little further. Next time we'll look at added patterns and textures.


No comments:
Post a Comment