Over the past couple of lessons, we talked about using pencil to draw and shade a paper doll. Today I want to go over how to color that doll in Photoshop.
There are a number of different ways to use something as simple as a pencil sketch and we'll go over a few. I love combining digital and traditional media. Before scanners & learning digital art, I thought of every drawing and painting as something almost sacred, not to be tampered with. Thankfully, that attitude has changed and I find programs like Photoshop and Illustrator to be liberating rather than limiting. In fact, this blog exists because I had the dream of creating a flexible, template based doll years ago. Learning Illustrator opened the door to fulfilling that dream with my Friday dolls.
Anyway, on to Photoshop.
That is the image I'll be working with today. It's the final scan of the pencil doll. First, we're going to look at placing the doll on a texture.
I have a dark film texture that I picked up during a recent graphic binge that I want to start with. If you don't have a back catalog of textures -- and it's addicting to collect them! -- go visit Lost and Taken. They have a great collection of free textures.
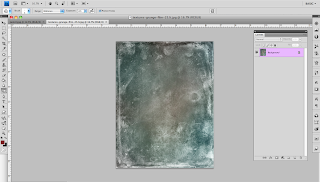
This is my texture as seen in Photoshop. Rotate it so that it's horizontal and open the pencil sketch. I like to make a new file where I copy & paste the texture in one layer and the sketch in another. Try to preserve your original images!
Here are my two images in one new file. The texture is at a resolution of 300ppi (pixels per inch). I think we've talked about resolution before, but let's go over it again. The resolution of an image is describe a few different ways: dpi (dots per inch), ppi (points per inch), etc. As usual, Wikipedia has a great article about image resolution. 300ppi is a high resolution, appropriate for printing out. When I scan my images, I like to scan them at 600ppi. There are two reasons for this. First, you should scan larger than your final image and scale the image down. Scaling down preserves details while scaling up or enlarging will decrease image clarity. And second, I use 600ppi specifically because it's twice the final image resolution I want, therefore, I can scale my images by half without having to think about it! This comes in handy when I have multi page dolls that I'm trying to edit.
Anyway, we're going to leave the dark texture in the background as it is and manipulate the image of the pencil sketch.
I want this image to look like it's printed on a film negative, so I need to invert the colors in the sketch. Go to Image > Adjustments > Invert. Now I have light lines on a dark image.
Go to Image > Adjustments > Levels and adjust the black and white contrast of your image. The background should be pure black. Then go to the Layer Styles in the Layers panel and select Screen.
Now there's an image with white lines on a dark background. Next I take the eraser and rough up the edges of the pencil image so that it blends better into the dark texture. I then duplicate the texture layer, set the second one to Multiply and adjust the darkness of it in the Hue/Saturation palette.
So there's my final "negative" paper doll. The principles hold for virtually any textures and colors.
Here's a multi-color watercolor background with the pencil image on top. The pencil sketch is set to Multiply.
And here's what happens with a little paint. I added a layer under the pencil sketch and painted in some colors.
There are lots of beautiful things you can do with a shaded pencil sketch and Photoshop (or another image editing program). That last image is large enough to download, so print it out & take a look at it!
Check back in on Friday for a new doll to download.
And, in completely non-paperdoll news -- if you're a Star Trek fan (and we all know I am), go check out the Valkyrie Directive. It's a discussion about the women of Star Trek by women who love Star Trek. Worth a read.


No comments:
Post a Comment
Comments post after approval