It's been a while since I've written a tutorial. Since creating the Santa paper dolls, I realized that I had some tings I wanted to share again. So here's a tutorial I used to create a lace panel pattern brush. I've used this method on several projects, including this one and the cowgirl Mrs Claus.
Start by opening Illustrator. This should work in just about any version and would probably work in most vector programs. Create a new file, any size.
The first thing I want to do is create the panel. I'm going to keep it simple.
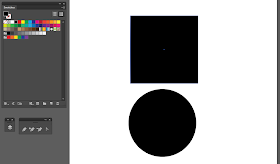
Using the shape tool, create a square and circle. Mine are each 200px by 200px. With the shape tool selected, click once to get a pop up menu. From here, you can define the size of the shapes.
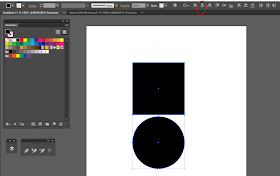
Next, select the two shapes and align them through the center. I circled the center align icon in red. Once the shapes are aligned, I move the circle up until the bottom line of the square aligns through the circle horizontally. This is why I wanted the shapes the same width.
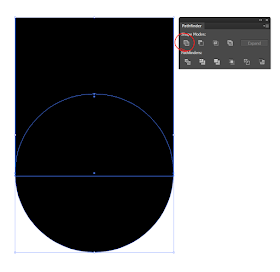
Select the two shapes and use the Pathfinder to combine them. I circled the unite option in the Pathfinder palette.
Once the new shape is finished, go to Object, Path, Offset Path. Choose a negative number -- this creates a new path inside the shape. This is where we'll start creating the "lace".
Make sure you have stroke selected and not fill. Choose any color for the stroke and really, any width. I'm going to make some dots here but any shape, single color brush, etc, would work here.
I wanted a series of perfect dots for this pattern. To create this on the stroke, select rounded caps & corners, 0 dash, and any number for the gap that is equal to or greater than the stroke width. In this case, I have a 14 pt stroke and 28 pt gap. Once this is finished, to to the Object menu, select expand appearance with the stroke is selected, and then (while still selected) go to the Object menu and click expand. There's a pop up menu -- make sure both stroke and fill are selected.
There are now a series of perfect circles, all lined up. To create a lace look, we want to knock-out the purple section from the black section. To do this, select both the black object and your series of circles, then go to the Pathfinder menu.
Using Pathfinder, select the divide icon (circled in red). This will cut out the purple circles from the black background.
At this point, I can create the brush. This shape can be as simple or complex as you want. I have an example at the end that's more complex than this.
Delete all of the purple circles and you should have an all black shape with circles cut out.
With the shape selected, open your Brushes menu, click on the new icon (it's the small square in the bottom right), and select Pattern Brush.
Illustrator has created a pattern brush from the shape. At this point, all you really need to change is the Colorization. I like Hue Shift. This enables the brush to become the color of the stroke.
And that's it. Now you have a shiny new custom brush!
The top brush is the one we just created. The second is a pattern I created. And the third is the same pattern as the second, but applied to a circle. Brushes can be applied to any path and the size can be adjusted using the stroke menu.
If you're really feeling it, you can also export the shape and use it in Photoshop as either a custom shape or create a custom brush there.
Anyway, that's how I do it. It's a lot of steps but not really too complicated. I'll have a new paper doll up on Friday!


this is really awesome. maybe if i ever get a new drawing tablet, i'll re-consider doing some digital art. tutorials like this are so helpful!
ReplyDeleteTablets are great. I had a Wacom for ages...still do, somewhere. As challenging as my Surface has been, it's a joy to draw on in just about any program. It's a more natural experience.
DeleteOn the flip side of that, I really need to get out my paints and work on that. I haven't painted a paper doll in a year or more. And oils...ugh. I've finished one still-life in 7 years. Gotta get back into that! There's always something :)
I have a place to dress dolls, hope you like
ReplyDeletehttp://jugandoconelestilo.blogspot.com
Best regards.
I keep thinking that one day I'll learn to make drag-and-drop dress up dolls. Good for you for learning how to create them :)
Delete