It's tutorial time! I'm trying to write tutorials as I learn new techniques, rather than trying to force myself on to a schedule. Lately, I've been spending more time in Photoshop than usual, and I've been testing out some new techniques. I find Pinterest to be an amazing resource and this tutorial is similar to one I found there.
In the tutorial I found, the artist used Paint Tool SAI. It's a tool I'm unfamiliar with, but it seemed like the technique would work in Photoshop. Essentially, the artist painted the darkest skin tone, then built up light tones over than using a blur tool. That's pretty much the complete opposite of how I work! So here's how it went for me....
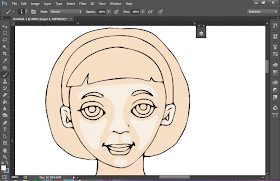
I'm using my December doll to demonstrate. Here I have the outlines on one layer and a skin base color on another layer. Doesn't really matter what skin tone you use (light, dark, etc) but use the darkest version of it. This will become your shadow.
Create a layer above the skin base but under the outline layer. Using a hard brush, draw in a lighter skin tone. This will become the middle tone of the skin color.
Once the light color is blocked in, go to Filter > Blur > Gaussian Blur and play around with the slider. I'd like to say there's some perfect number but there isn't. It's just playing around til it looks good.
This can be done several times, and I find it works best on multiple layers.
Here I added another light tone above my first light layer and added a dark layer between the light and base tones.
I find the best use of this blurring technique is creating blush. It's something that almost never looks good on my previous dolls. This, however, works really well!
The two images above show the blurring technique first and the original paper doll second. In the top image, there's a nice glow created by the different blurred layers. With the second doll, it's much more flat (and pale!)
One note: if you're using a background color and the blurred colors show on it, just erase the overlap. I spend a lot of time adding color, then using the magic ward to select outside my outlines and removing extra color. Sometimes it works well, sometimes you need to zoom in and erase....
So that's what I've been working on! I find that building up blurred layers can also work on hair, too. Play around with different layer opacity settings, too. Soft Light can be very effective. Let me know how this works for you!


I've heard of people starting with the darkest color and working their way to light colors using digital shading, I have just never tried it myself. I think like all things, there's no "bad way" to do something- just whatever works for you. I do like the way the blush looks on the paper doll.
ReplyDeleteI agree - there's really no right or wrong way to digitally color. This method seems to give me the look I want more quickly than some of my previous attempts. I find that I'm very fussy about digital art, much more than with paints. With paints - specifically watercolor - once a color is on the paper, that's it. With digital coloring, I can spend hours fussing over something instead of just going for it. I'm really enjoying Photoshop right now, and learning new techniques is definitely a big part of that!
Delete