Today's tutorial was supposed to go up yesterday. I had planned on writing it during my youngest son's nap. He decided napping was not on HIS schedule. Oh well. Here it is today.
What we'll be doing today is taking a hand-drawn image and creating a seamless repeating pattern in Photoshop. This can be done in Illustrator, too, with a slightly different method.
Materials List:
Small partial pattern drawing (I did mine using black pens & markers)
Adobe Photoshop
Adobe Illustrator
To begin with, I took a square piece of paper and drew a random patter in one quarter of it.
Once your drawing is completed, scan it and open it in Photoshop. I used the Levels menu to tweak the colors. Go to Image > Adjustments > Levels. Select the white eyedropper (on the far right) and click the DARKEST section of white in your image. This will make everything that color or lighter white. Take the black eyedropper and click on the darkest spot in your drawing. That will make your drawing essentially black & white. Delete the white portion so that you only have the black image. I add a layer underneath that's white so I can see it a bit better.
The next step is to start copying and rotating the image. Duplicate the layer and start rotating. I find holding shift helps - it constrains the rotation. I tried using the transform and flip functions, but found that eyeballing it worked well enough. If you want a precise pattern, Illustrator is a better way to go. I'm looking for a hand-drawn image with all it's imperfections.
Next, I want to fill in some of the white spots where the patterns meet. Again, this is supposed to be hand-drawn so it doesn't have to be perfect.
Here's the image with the white patches filled in. The next part of this tutorial is an adaptation of a tutorial I read about a while ago. Find out how big your image is and divide it in half. My image, for instance, is 1756 px. Half of that is 878 px. You'll need that number in the Offset Filter.
Go to Filter > Other > Offset. Put the value for half your image (in my case, 878 px) in both the horizontal and vertical spots. The image you get will look something like the next image.
Now I want to blend all of these separate sections a little bit better. You can do a couple of things here. Print out your image and and draw in the white sections, then rescan and combine your images. You can cut & paste in Photoshop. Or draw directly in Photoshop. I chose to use Photoshop only.
I've filled in some of those white spaces here. I chose to cut & paste some of the elements already in the image. Merge any layers and select the entire image. Go to Edit > Define Pattern to create a pattern swatch.
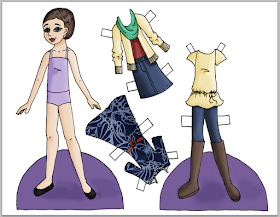
To demonstrate how the pattern looks, I opened a Photoshop file of the doll and added the pattern. I selected the section I wanted to place the pattern, created a new layer, and set that layer to the Soft Light blending mode.
Your pattern can be anything. Black & white, color, hand-painted, etc. It can be as simple or as complex as you'd like. The Offset filter is the key to the whole process. Once you have a seamless pattern in Photoshop, it's easy to take it into Illustrator.
Open your image in Illustrator. Live Trace your image. Make sure to select Ignore White. Click Expand and then drag the whole image into your swatches panel. That's it!
This is the pattern in Illustrator. I rotated the pattern 45 degrees so that it created a diamond pattern. With one hand-drawn image, you get a Photoshop pattern and an Illustrator pattern. Nice little two for one package!
This tutorial uses a few of the lesser know Photoshop features. Any questions, let me know. And there's a special doll to download on Friday!


No comments:
Post a Comment
Comments post after approval