Monday, October 29, 2012

Stormageddon 2012

For anyone who doesn't know this, I live in the Merrimack Valley/North Shore region of Massachusetts.  And for anyone who hasn't heard, that means I'm right on the edge of a monster storm!  Having said that, most of my time has been said preparing the house & kids for Stormageddon 2012 and less time on paper dolls lessons.  So there's no lesson today.  However, there is a Halloween doll to print out.  For anyone who has been to my portfolio site, it might look familiar.  This was drawn out on paper, outlines and coloring (including patterns) were done in Illustrator, with the final doll laid out in Photoshop.  They're here as jpgs.  If pdfs would be better just let me know & I'll post that as well.

Have a happy & safe Halloween.  And for all of you on the Eastern seaboard, stay inside today!


Friday, October 26, 2012

Fashion Friday - Cole

And now for something completely different....

I decided to make a guy doll. I'll admit, this is more of a modified version of my groom doll than anything else, but it was fun nonetheless.

Still working furiously on a new doll project.  I was shooting for November 1st to launch, but it'll probably be more like the following Monday.  It's going to be a customizable/personalized doll.  Again, more on that to come.

Til now, help find Cole a date :)


Cole - Fashion Friday Paper Doll

Monday, October 22, 2012

Editing in Photoshop

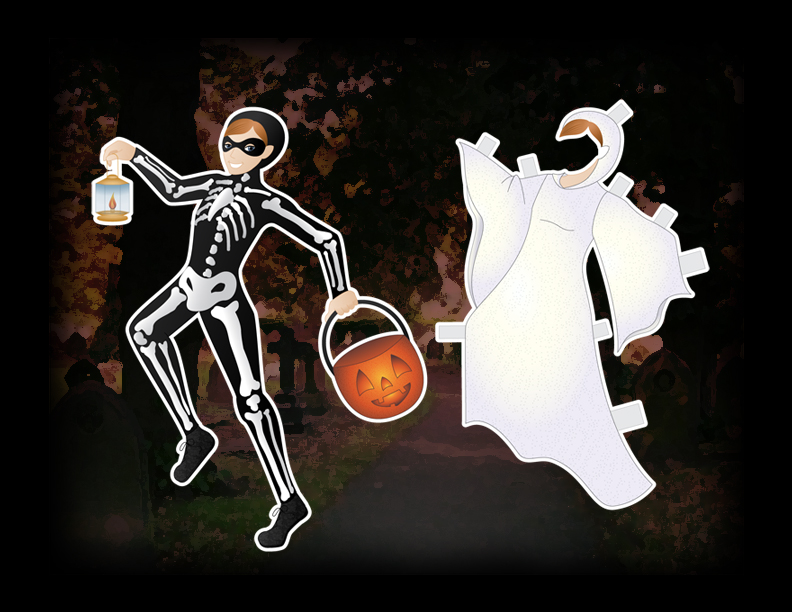
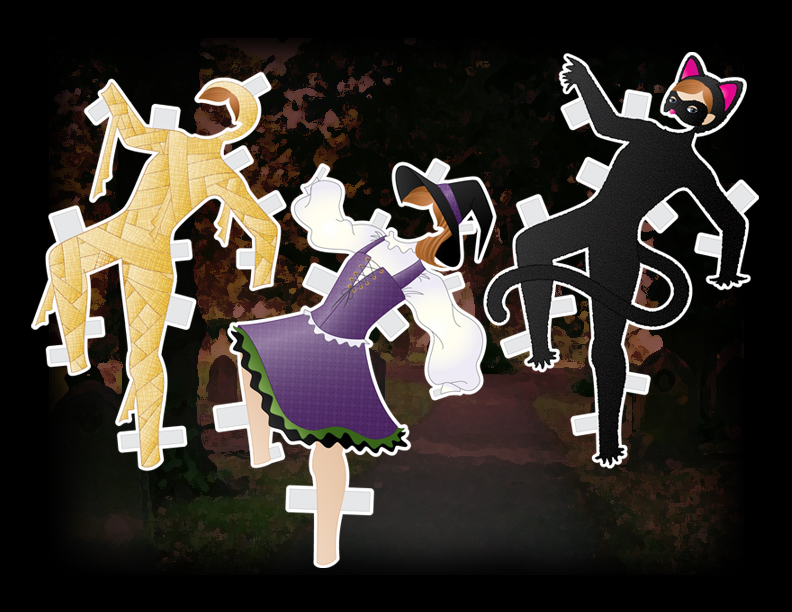
I thought this would be a good place to talk a little bit about how I clean up my artwork.  I work in a variety of materials and each one has its own challenges.  Mainly, I like to create dolls either in watercolors or in Adobe Illustrator.  And the two methods couldn't be more different! With the watercolors, I often need to do a little post-production work in Photoshop.  That's what we'll go over today.

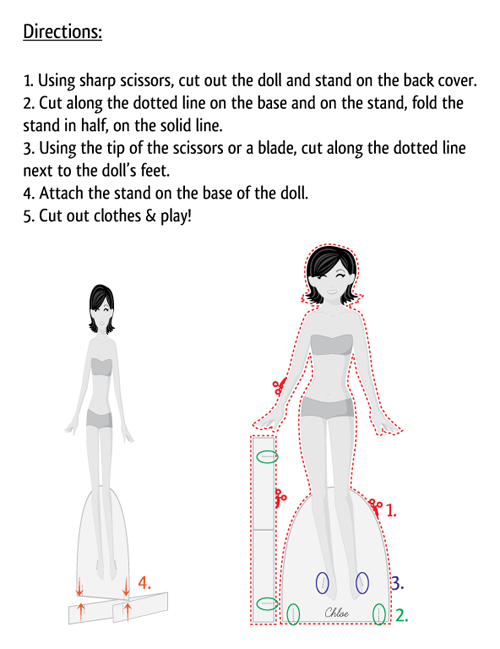
First, you'll need a doll to work with.  I'm using a scan of the colored pencil doll I made a few weeks ago.  I highly recommend a scan.  If you don't have (or don't have access to) a scanner, you can use a digital camera to "scan" your image.  It just requires a few extra steps that I'm not going over today.  If there's a need, I can certainly come back to that.  You'll also need Photoshop or a similar editing program.  I also like to use my Wacom tablet, but you can do all of this with a mouse.

Open your image in Photoshop.  Adjust the image rotation if needed.  Go to Image>Image Rotation to do this.

Let's talk a little bit about the unedited image.  First, there's some discoloration on the bottom and edges.  Second, the head and bases are almost cut off.  Third, there are some random mistakes and artifacts that need to be cleaned up.

Start with the broad, general edits and move to the small, detailed ones.  In this case, resizing the image is the biggest, easiest change to make.

Go to Image>Canvas Size.
This opens up a resizing panel.  This panel tells you the current dimensions of the canvas, has a place to adjust the size, a menu for measurement units (inches, pixels, etc), a visual menu for selecting how space is added (to all sides, just the top, etc), and the color of the new area.  We really only need to add to the size.  I made my canvas 1 inch bigger all around.  Just add a 1 to each slot.

So now I have a new, larger canvas.  It's not 8.5 by 11 at the moment.  We'll adjust that at the end.  Working larger and scaling down is always better than trying to work small and scale up.

Next, I add a layer mask.  It's located on the Layers panel at the bottom.  It's a rectangle with a circle in it.

A layer mask is a secondary layer added to your current layer.  I use a brush with either black or white on the layer mask, but you can use a variety of tools such as gradients.  Sections under the black are hidden and things under white are visible.

I used the Lasso tool and the Paint bucket to fill in broad sections of the layer mask.  Make sure that you're on the layer mask and not the layer itself, or your layer will be black!

Now I go in with a soft brush and get as close to the image lines as I can.  If you overpaint somewhere, either paint back over it in white or use the eraser.  Nothing is permanent with a mask -- and that is the advantage to using one!

So this is the layer mask at the end.  It takes time and it can be tedious, but it's worth the hassle.  I have a red background here to better illustrate what the layer mask looks like.  Change that layer to white and make any final edits to the doll.

I try not to do too much if I can help it.  Part of the appeal of watercolor or pencil is that it's done by hand, with all the imperfections that come with that.  I darkened some shadows with the burn tool, and erased some minor scanning artifacts with the close/heal tool, but that was about it.

This is the final doll.  I went to Image>Image Size and changed the dimensions.  I changed one to 11 and the other dimension was linked, so that updated to around 8.  I then went to Image> Canvas Size and added the missing half-inch so that my doll was 8.5 by 11 inches.

So that's it for now.  I'm hoping to have an intro to Adobe Illustrator up next time.  Til then, have fun editing dolls!


Friday, October 19, 2012

Fashion Friday - Abigail

Here's Abigail.  I wanted to go with fall/Halloween colors.  There isn't much of October left, so I thought it would be appropriate.

In other news, I recently finished a circus-themed doll for the next Paper Studio magazine.  Once it's been published I'll post it here.  I went with watercolors (and a tiny bit of Photoshop) rather than all digital.  It's great & I'm eager to post it.

Also, I'm working on customizable paper dolls.  That's about all I'm going to say about that at the moment.  I'm hoping to have the first round ready for November first.  Maybe putting it out there will help me stick to the goal!

Anyway, here's Abigail.

Abigail - Fashion Friday Paper Doll

Monday, October 15, 2012

Photoshop - Working with Patterns and Textures

Today we'll do a little more with Photoshop.  I want to go over using patterns & textures with the doll we were working with last time.

Open your doll in Photoshop.  Ideally, you'll have a layered psd file from last time.

Lock all of your previous layers and create a new layer above the Color layer.  Call this Patterns (or Textures of something similar).  This is where we'll apply the layers and textures.  Just a note about layers: I love them!  Be sure to name your layers so that they stay organized.  I try to do one thing per layer -- it makes fixing mistakes or making changes a lot easier!!

I want to take all of the blue colors and add a jean texture to them.  Using the magic wand tool, go to the Colors layer and click on something blue.  Since all the blue tones in this image are the same, save a couple of minutes and go to the Select menu.  Choose Similar.  This selects all the same color.  While the blue are selected, click on the Patterns layer.  Then choose the paint bucket tool (it's with the gradient tool).

One of the great things about Photoshop is the ability to customize.  You can add your own pattern or texture very easily (I may have a whole lesson just on that...).  If you decide to look for patterns and textures, make sure your search for seamless ones.  I happen to have a seamless jean texture already so I'll use that one.  While your blue colors are selected, open the paint bucket tool with patterns selected.  Choose the pattern you want and click the paint bucket inside the selected area.  Make sure you are on the Patterns layer.

You should have something similar to the image above.  All my blue colors have a jean texture over them.  The blue is still there on the Colors layer.  All of those shadows and highlights we worked on last time are still there, too.  Now, with the jean on its own layer, we can play around with transparency, color, etc.

Just by playing around with the layer mode menu, I got four interesting variations.  I used screen, color dodge, soft light, and difference.

Using the same method as the jean texture, I added a pattern to the shirt and suit, and a texture to the sweater.  Make a new layer for each pattern/texture to make life a little easier.  Play around with patterns, textures, colors, layer modes, etc.  The possibilities in Photoshop are truly endless.  And this is by no means a comprehensive understanding of Photoshop.  I've really just scratched the surface of what can be done.  This doll, for instance, was created using the same techniques I used above.


Next time we'll take a previous paper doll done non-digitally and learn how to clean it up in Photoshop. 


Friday, October 12, 2012

Fashion Friday - Sarah

I just realized I posted my Lily doll twice. Oops :)  This week it's back to normal dolls -- no more wedding stuff for a little while.  This one's Sarah.

Sarah - Fashion Friday Paper Doll

Tuesday, October 9, 2012

Photoshop: Shadows and Highlights

First, let me just say that I have been sick & miserable and the kids have been sick & miserable.  This is the first day we've all felt ok in a week or so.  If my writing is a bit off, I blame the Dayquil.

Second, my husband bought me an international Ancestry.com membership for our anniversary this past weekend.  I have always loved researching my family tree & history, but now it's virtually an obsession! According to the information I've found in the last couple of days, I may be related to King Arthur.  What!? Exactly.  I need to look into it a lot more, but how cool is that?!

Third, please be aware that I'm starting to insert affiliate links.  I have control over what is advertised & I'm only posting relevant links to things I have used.  Click them or don't; I just want to be transparent about it.  

Anyway, enough about me.  Let's talk Photoshop.

Open your file from last time.  Preferably, you saved it as a .psd file.  If you did, add a new layer under the outlines layer but above the colors layer, and name it Shadows.  If you saved it as something flat (jpg, png, gif...), just add a new layer on top.  We're going to work with layer blending modes again.

Lock your other two layers.  We'll be working on the Shadows layer for now.  Set your layer blanding mode to Overlay.  I use overlay so that can paint all of the shadows in black.  I don't have to find darker tones of all of my colors.  Make sure your paintbrush is set to black & select a large, soft brush.  We'll be creating soft shadows on the doll and clothes.


 I selected a 200px soft brush set at 50% opacity.  Use any size & opacity combination you like.  And use the bracket button shortcuts to adjust your brush size on the fly.  Another shortcut I love is Undo.  Command (or Control)-Z to undo one step, Command-Option-Z (or Control-Alt-Z) to undo multiple steps.


Here, I've roughed in the shadows in the doll. Don't worry about staying inside the lines.  We'll get rid of any shadows we don't need later.  Continue doing this on the doll and outfits until it looks good.  Keep in mind light source direction - especially on the dress that's upside down!


Here are all of the shadows roughed in.  At this point, go in and erase the shadows that fell outside the lines.  Either erase them on the Shadows layer, or go to the Outlines layer, use the Magic Wand to select outside the lines, click back on the Shadows layer, and hit the delete button on your keyboard.  That erases a lot of it, and then I can go back in and erase the rest.

This is what the clean up looks like.  I think this doll needs a Highlights layer, so we'll do that next.  Create a new layer under Shadows and above Color.  Change the blending mode to Soft Light.  This will give the white a slightly transparent look without changing the opacity of the paint color.  Lock the Shadows layer.  Select your paintbrush at 100% opacity to start and paint in your highlights the same way you painted in the shadows.


In some areas, I changed the opacity of my paintbrush.  Do this as needed.  Add highlights where they look the best.  Not everything needs a highlight.  Clean up the highlight layer the way you cleaned up the shadow layer, as needed.

We'll stop there for today.  Again, this would be a fine place to call the doll done & print it out and play with it, but I want to take this a little further.  Next time we'll look at added patterns and textures.


Friday, October 5, 2012

Fashion Friday - Anniversary Edition

So the Fashion Friday doll this week is another wedding one.  It wasn't something I planned -- just worked out this way.  Today's doll is a bit different.  It's two pages and it's to commemorate my wedding anniversary.  Tomorrow is our 5th anniversary so I created a bride and groom doll.  I took a few liberties, but I love the way it came out.

For anyone printing the doll, it's a large pdf (about 10mb).  If the pdf is too big, I'll put up jpgs or something to download.  Also, the gown should fit all of the previous dolls just fine.  Created a male doll was a challenge & I might do more of them now that I've worked out the kinks.

Anyway, enjoy!  I'll try to post on Monday, but we'll be busy most of this weekend so if I post, it might be a little late.

Wedding Anniversary Paper Doll

Monday, October 1, 2012

Using Photoshop to Digitally Color a Paper Doll

Today we'll go over how to use Photoshop to color a doll.  Photoshop has a lot of wonderful features and uses, and today we'll just be using the basics.  Any photo editing program should be able to handle everything we're going to do.  I have Photoshop CS4 and I'm running it on a Mac, just for reference.  I'm going to assume very basic understanding of Photoshop.  Questions are always more than welcome. 

Materials List:
Inked paper doll drawing
Scanner
Computer
Photo editing program (Photoshop CS4)
Mouse & drawing tablet with digital pen (Wacom Intuos tablet)

That's my material list.  You can do this with a whole lot less than what's listed there.  I had a teacher who created very elaborate and detailed digital paintings with a mouse, so the Wacom tablet is totally optional.  I love mine, so I'm a little biased.

Make sure you have a clean outline to work with.  We can fix it in Photoshop if it isn't perfect, but these should be as close to your final outlines as possible.  Scan your image at a high dpi.  I scanned mine at 600dpi, but lower would be fine too.  300dpi is a good rule of thumb for anything you want to print.

Open your image in Photoshop.  The default setting will have a locked layer called Background. 


Click on the lock image in your Layers panel (on the right of this image, highlighted purple) and rename your layer "Outlines".  This technique is going to use several layers, so make sure you're well-organized.


Photoshop has a number of layer setting options.  Change your layer from Normal to Multiply using the drop-down menu in the Layers panel.  This makes all of the white on your page transparent.


Create a new layer by clicking on the square next to the garbage can in the layers panel (lower right).  Drag this layer under your first layer.  Lock the Outlines layer by selecting it in the layers panel and clicking the lock.


I renamed that bottom layer "Colors" because this is where all of the base colors are going to go.  Select the brush tool and a skin color and color in all of the skintone.  It's ok if it's outside the lines!  To increase & decrease your brush size on the fly, press the "[" and "]" buttons.


To erase any color outside the lines, I like to use the magic wand tool.  Go to the "Outlines" layer, click anywhere outside the doll, then select the "Colors" layer and press the delete/backspace button.  And all the extra color is gone!


You can also just go in with the eraser tool but I find selecting & deleting faster and easier.


Continue to block in all of the base colors.   The image above shows the colors as viewed under the black outlines.  The image below shows the colors without the outlines


Finally, I want to darken the outlines of the doll.  The image below shows the outlines before I darken them.  The outlines aren't actually black, they're just a dark grey.  Spots where the color is under the outlines, the outlines end up a little darker.


First, unlock the "Outlines" layer.  To darken the outlines, I use the Levels menu.  Go to Image>Adjustments>Levels. 


Select the black eyedropper.  Click on a section of the outline that is as close to black as you can.  This will change the grey tones to black.


This is what the darkened outlines look like.  I've noticed that there are a few spots I want to clean up on the "Outlines" layer.  I go in with the eraser & clean up lines and spots.  Lock the "Color" layer before you do this so you don't accidentally erase that layer.


I think the outlines are a little rough, so to smooth them out a bit I use a slight blur.  Go to Filter>Blur>Gaussian Blur.  I used 1.0 as my setting.  It was just enough to slightly smooth the lines without actually making them blurry.


This is a good place to stop.  This would be a fine place to print & play with the doll.  But I'm not quite done.  Next time we'll go over shading the doll and using patterns & textures to enhance the blocks of color.